If you have already created a global error handler plugin (if not then click here to know how to create one), then you definitely want to share that among all different mule-applications. This article gives an example of how to install a global error handler plugin in a mule-application.
As a recap, our error response builder is a mule plugin which is responsible for managing error response and handling generic errors. This plugin will be imported in each working Mule project and invoke the generic error handling flow available in it.
This article assumes that you have maven installed on your local computer.
Pre-requisite:
- JDK (tested in 1.8.0_211).
- Maven (tested in 3.3.9).
- Mule runtime version 4 or above.
- Anypoint Studio version 7 or above.
There are two activities related to the plugin:
- Installing the plugin into a Mule application
- Upgrading the plugin version.
Installing into a Mule application
To install the package please follow the following steps:
- Check-in updated source code of com-plektonlabs-utils-errorResponseBuilder from your source code repository
- Go to the project source directory in command prompts.
- Run command “mvn clean install” and notice that it installed the jar as mule-plugin into your local maven repository.

- Now go to your mule-application (say the project name is “plektonlabs-mule-api“) and add the dependency in pom.xml into plektonlabs-mule-api
<dependency><groupId>com.plektonlabs</groupId>
<artifactId>com–plektonlabs–utils-errorResponseBuilder</artifactId>
<version>1.0.0-SNAPSHOT</version>
<classifier>mule-plugin</classifier>
</dependency>
- Clean the current project and build again (either in command prompt by typing mvn clean package command or by anypoint studio)
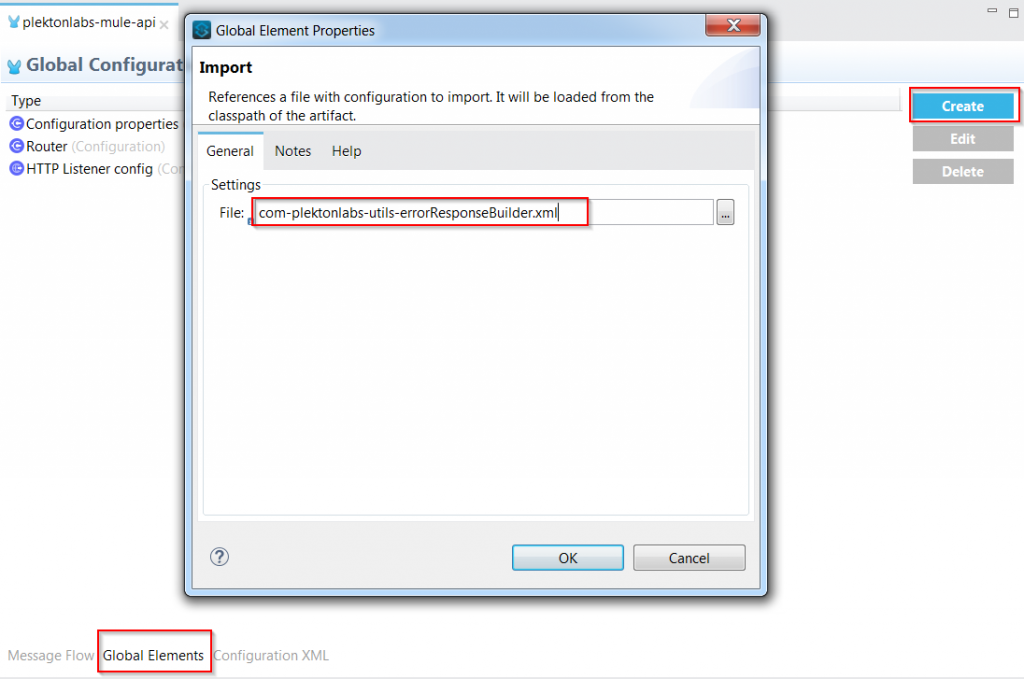
- Go to any flow file in your mule-application, in our case it is “plektonlabs-mule-api” and click on the Global Elements tab at the bottom.


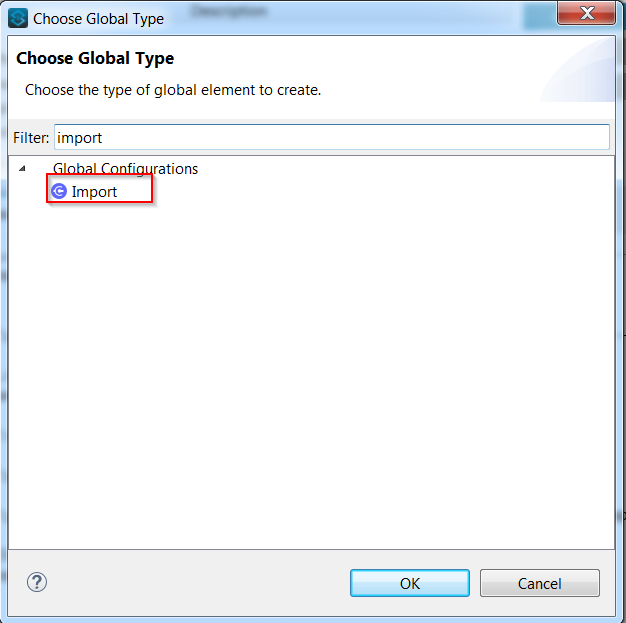
- Create “Import” element with the reusable global error handler xml file in your mule-plugin, i.e. com-plektonlabs–utils-errorResponseBuilder.xml

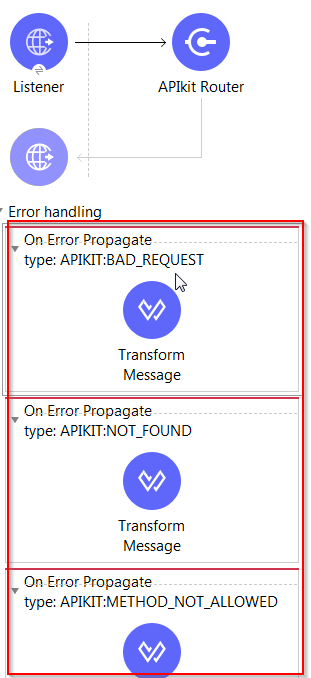
- Go to the main flow (the flow that has your HTTP listener), remove your default error handler.

- Go to xml view of the xml file contains the main flow and add the following lines in the bottom of the main flow:
<error-handler>
<on-error-propagate enableNotifications=“true” logException=“true” doc:name=“On Error Propagate” doc:id=”429ee947-eb6c-4449-8109-7279e4cc9de7″ >
<flow-ref doc:name=“global-on-error-propagate” doc:id=“d131870b-e395-4d98-9b24-8c77d579328f” name=“global-on-error-propagate”/>
</on-error-propagate>
</error-handler>
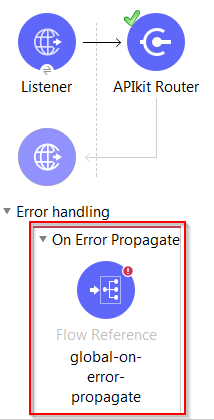
It will refer the flow in your mule-plugin. The final flow should look like this the following:

- Do the last step for the console as well (optional) if you have any API console.
- Please note that the flow reference gives a false error. You can run and test by ignoring this error.
This works fine for me. Just remember that you have a maven in your anypoint studio. When you are installing your mule-plugin, you need to make sure it is installing into the same repo. Otherwise, anypoint studio won’t find the mule-plugin package while building the mule-application if it maintains a different local maven repository.
Three things that I did not like about the new Mule 4 error handler and the mule-plugin:
- I can refer a flow from the external mule-plugin into a mule-application but I could not refer an error handler
- I don’t see the mule-plugin package after resolving the dependencies in my mule-application. Its somewhere hidden, otherwise, it wouldn’t work. I just could not locate it.
- Even though the flow reference works if it is in mule-plugin, design time it gives an error, which is a false alarm to me.
This is it. Happy Learning!


